
Taking photos of LEGO® Minifigures have become a popular way past-time and thanks to better cameras on smartphones, taking great photos is getting easier.
Here’s a way to take your photos to a new level with a little help with some props and low-cost apps available.

In this quick guide, we’ll show you how this photo of an airborne astronaut was taken.
Step 1: Keep it steady
For the photo magic to work, you’ll need to take two almost identical photos. Later, these two photos will be edited together to create the effect we see.
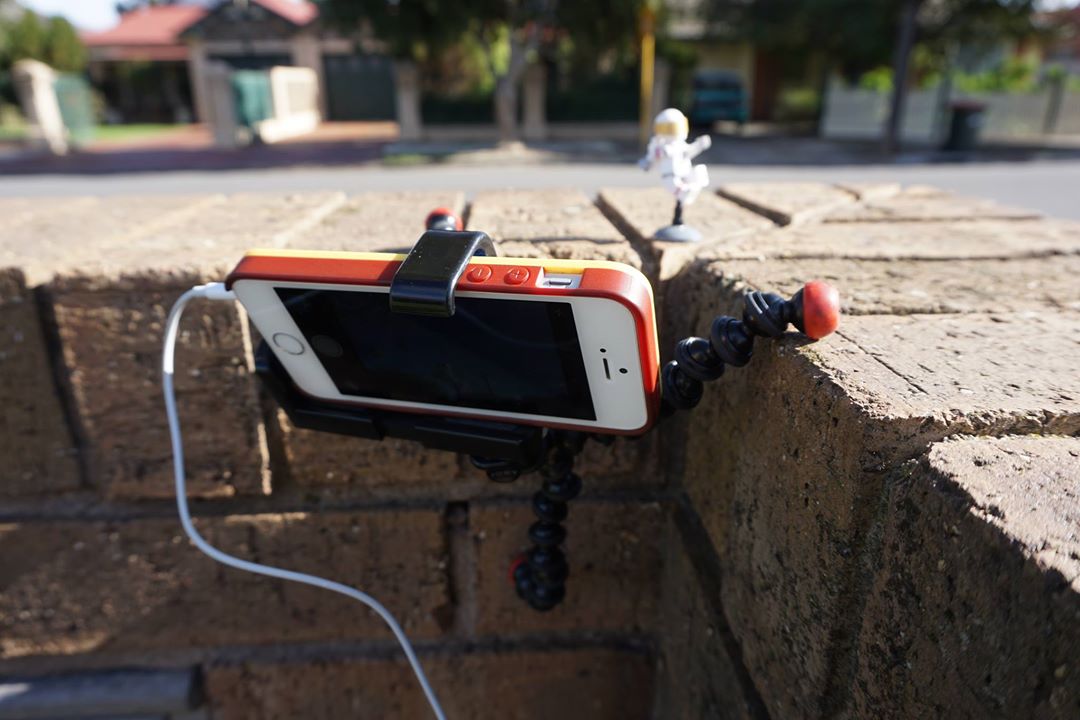
To keep the photos as identical as possible, you will need to keep your camera steady so the position doesn’t change between photos.
Try using a small, flexible tripod designed for smartphones. In the photo above, you can see the minifigure is set up with a couple of parts to hold it off the ground.
2. Lock the exposure and focus
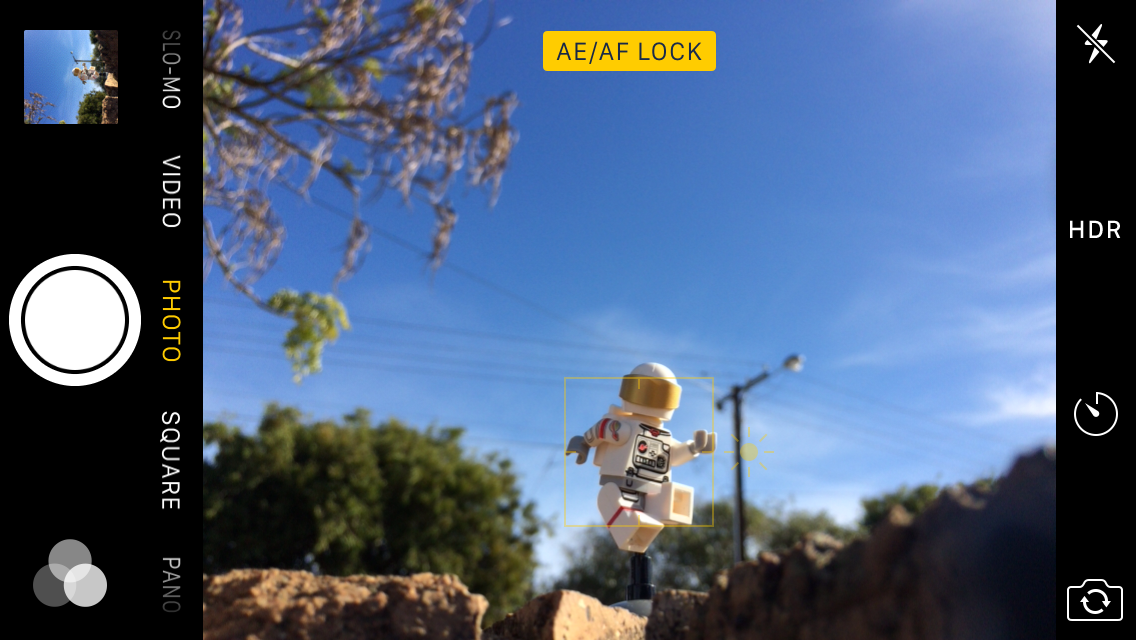
Before taking your first photo, make sure you activate the AE/AF lock. This will make sure your exposure and focus don’t change between photos. For most apps, do a long touch (2 seconds) on where you want to focus (on the minifigure) to turn the AE/AF lock on.
Once you have the lock on, take your first photo!
3. Take a background shot
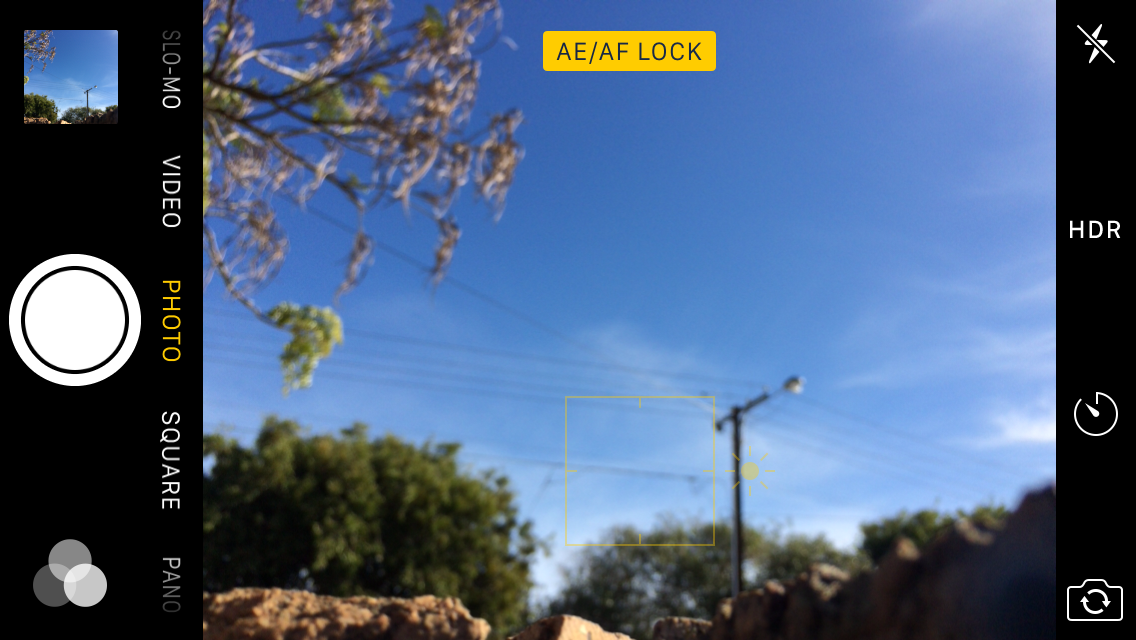
Next (without moving the camera), take away your minifigure away so you have a shot of just the background. Making sure your AE/AF LOCK is still on, take your second photo.
By getting your two photos as identical as possible (except the minifigure), your next steps will be a lot easier.
4. Open your editing app

Now that you have your foreground and background photos, it’s time to create our flying/airborne effect.
Using an app, you can combine your two photos to create a new one – and also erase the parts holding the minifigure up so it looks like your minifigure is flying!
There are a number of different apps available for both Android and iOS devices that you can try. Have a look through Google Play (for Android) or App Store (for iOS) for photo editing or layering apps to find one that may suit you.
In this example, the full-version of PicMix is being used. It’s a cheap app and is available on both Android and iOS.
5. Editing in PicMix

With PicMix open, you will need to add your two photos in order to edit them.
Tap the folder in the bottom left corner, and tap “add background.” Choose the photo without the minifigure.
Tap the folder again to add your photo with the minifigure to the foreground.
You can now use your finger to erase the parts holding up your minifigure. You can pinch to zoom in/out and you can tap the brush icon to change the eraser size/softness for more accurate edits.
Once done, tap the folder and then tap ‘save merged to library.’
6. Make any final edits

Finally, to make any edits, open your camera roll or photo gallery to find the new photo you made in PicMix. You can now make any further edits (e.g. contrast, brightness etc) in your favourite editing app.
Well done! Keep practicing and share your great flying photos!
